Showing posts with label Tips and Tricks. Show all posts

Monday, April 23, 2012

I Set Fire... To the Rayon


 Hey guys. you know what my fabric crush is right now? Rayon.
Say it with me now: Rrrrraaaayyyooonnn. 
Mmm, makes you think of luscious drapey soft lightweight amazing stuff, huh? 

I feel like it's been getting more popular lately as I've seen it pop up more in stores. 
Usually all I find are tiny floral prints that break my heart because I want so badly to love them for their drape, but I can't bear to look at them. They're like a girl with a great bod and 
horrible, oompa-loompa orange skin.
 It breaks the deal.

When I do find a print I like at bargain prices, I have to snatch it up. There's almost none in my stash since it's a fairly new discovery for me. I was gushing about it at Hancock's today, and the superchipper salesgirl told me about a horror story washing hers, and how you defs have to handwash it or you wind up with a shrinky, weird mess. 

I was scared, guys. Was my dream fabric more fragile than I could bear? I'm used to cotton. Turn that iron on high and GO BABY.

So, I took my honey home ($2/yd is a cheap date) and performed kinky experiments on a swatch.
I washed it in the sink, scrubbed it with regular hand soap, and ran hot tap water over it. I wrang it out, balled it up, and tried to tear it. Then, I ironed it dry like a bad girl. 
(I need to know if my partners are committed, okay?)

Results:


No apparent loss is color. 

The piece doesn't seem to have shrunk substantially or in a weird way, 
but I didn't outline it first to check.

While wet, the piece could be balled up super small, and seemed really fragile. 
It's really not a very substantial fabric.

 It was easy to tear into strips (and even made the cool noise they use in movies when people rip off their clothes). While dry, I couldn't tear it in any direction. Go to your rayon for emergency band-aids, folks.

It ironed well from wet to dry on the synthetic setting with no burning or melting.

The only difference I could tell after washing is a slightly lighter feel and different drape. But that's common after washing a lot of fabrics.

verdict:  
Rayon is the fabric for me!

I love you, baby.


Oh, and the answer to yesterday's mystery!


 This chickadee is wearing my Rorschach fabric, that I got at Hancock's for a steal, and still have three yards of! I technically have enough to rip off this dress, which might feel pretty cool. On the other hand, I don't think it takes full advantage of the drapes on this pattern; it just doesn't have enough body. Plus, it's slinkier than a snake. Just saying.

I feel so cool that some big wig sample seamstress chose my fabric for a pattern cover! It'll live on forever, and maybe my grandbabies will look back at catalogs and say, "Wow, Grandma, this vintage dress such pretty fabric!" And then everyone will know what great taste I have/had. Because I'll definitely be in chunky knit sweaters by then.

Special thanks to Marianna for all her awesome guesses!


Peace and Love, Everyone.
-Hannah Jean

Friday, April 6, 2012

Storing Patterns


So, I have a lot of vintage patterns.
Well, technically, they're my mom's patterns from when she used to sew, mostly in the 70's.
 (Genetic inclination?)

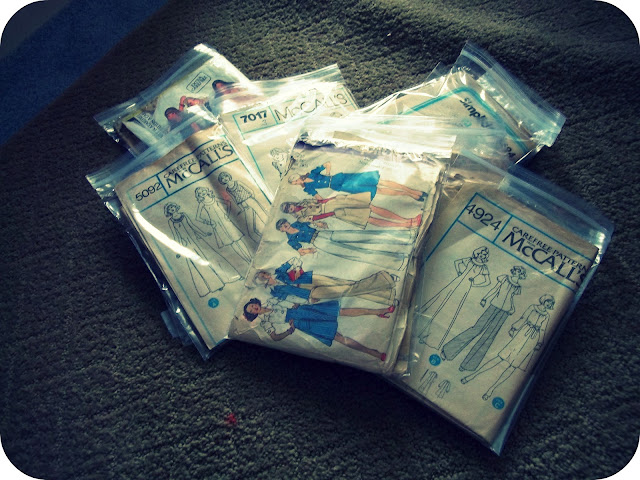
She worked at a fabric store. When a pattern went out of print, the stores were supposed to send back the envelopes to prove they weren't selling them anymore. This saved postage charges and waste.
It also meant the guts of the pattern, the important part, were conveniently taken from the garbage pile by workers thrown away.

So, forty years later, I have buckets of sewing patterns for women's wear, mostly in sizes 12-14, but no envelopes. The things float around my pattern box, all weak and vulnerable and cute, like puppies. Puppies with no skin.

So, I took a clue from Burda and wrapped those suckers in zip-locs. I only had the jumbo size, so I taped the bottom and one size to fold over in the back. Perfect fit.

I also did this with a few patterns which had seen better days, or where I had a hard time shoving the pattern pieces neatly back into the envelope. (Pretty much any pattern I touched before age 18)

Moral of the story? Use zip-locs, get happy patterns. 
Put some skin on those poor puppies, amirite?


-Hannah Jean

Saturday, March 31, 2012

Let the pretty dress distract your wonderful eyes

Lovely people.

I wasn't gone, I swear. I was in Holland.

You may say, "Hey! I know Holland! They have internet there!"

Yes, yes they do. But no cardreaders, apparently. And tourists there prefer to spend time with their tall Dutch boyfriends. So I have some catch-up to do with all of you!

Today's dress:
When this little girl grows up and wants to be a 
pretty pink princess flapper ballerina, she'll be all set.


 This fabric will make her feel ethereal.

Add wings and baby. BAM. Angel.


The fabric was a super-thin, incredibly soft baby pink knit.
 It had fine lines of thread making stripes every inch or so, and one more thing: SEQUINS. 
Every baby needs a little sparkle. Some clear, plastic sparkle.

This is how the dress would look if said baby could fly.

I used a baby onesie pattern and cut it off before it made the underwear deal, and then got inspiration from Melly Sews's super awesome tutorial for the skirt. I made 14 squares and edged them with satin ribbon, then sewed them in two tiers for a flappericious flippy skirt. 

I also added a nice, deep neckline in the back.

Babies don't have to worry about bras, right? 
They just have huge heads that need to fit into their garments somehow.


The fabric was so fine, I had to sew some of the seams with tissue paper underneath to keep my feeddogs from ingesting the stuff and making a really wonky zig-zag. Hungry little beasts.


At this point, I was really hoping the dress wouldn't
 turn out like a toilet seat cover.

At the end, I added a cute little medallion for interest. Yoyo + shank button + ribbon.

It's like a cuteness award.


I do have to add, as a tip for the future, that I initially lined the bodice with nude, but I was unhappy with the way it made the color look dingy. In the end, I lined it with self fabric and I got  a much purer, brighter looking color. The only trick was lining up the stripes, which I wasn't totally successful at, but whatever. Babies have incredibly low standards for that kind of thing.


Enjoy!
-Hannah Jean


Link parties:

Tuesday, January 24, 2012

Takin' Back

No really,  take in the back. Of your blouse.

 
  I like to go shopping as much as anyone, but lately there have been very few garments I'll wear as purchased. I'm much happier with a garment if I feel like it fits my body, and often I'm just a few seams away from making something on clearance look like a million bucks.

     I'm pretty used to taking in the waists of shirts and dresses, but I've had problems with bulging backs. I always figured the backs were simply too broad and that was the reason for the funny poofy look (grandma's blouse meets hunchback of Notre Dame-style). So, on this blouse, I extended the back darts to take up excess upper back width.

    The part of this story that wasn't fitting is that I already have broad shoulders, and the shoulder seams weren't falling down. When I took in extra width from the back, I lost a lot of mobility. Like, the kind you need to drive.


Me, driving in the blouse. In Britain, apparently.

So, I ripped that out and thought in another direction. Instead of taking out width, I took out length between the shoulder seams and the bottom of the armhole.


New dart indicated in pink/red. It was about 4" (10cm) uptake on mine.

  
Et voila! No more quasi modo. The paisley design hides the seam nicely.

Before & After

And now I can go on with my life without shirt-deformities. Thank you, sewing machine!


-Hannah Jean